I want to thank everybody who took the time to share the trailer for c with friends! I’ve received a few emails asking how certain effects in the trailer were achieved, so here’s a general behind-the-scenes post with photos and hopefully some helpful information.
Miniature Work:
The model was put together from various hacked up pieces of plastic toys and models, which were then re-assembled and spray-painted. LED lights were installed for the engines and wired to a switch inside the model.

Crewmember extraordinaire Al Gonzales built the model; here he does a rough assembly of unpainted pieces of the ship.
I decided later that I wanted blinking red lights on the front of the ship as well. Rather than rebuild the model, I positioned laser pointers on stands to the spots where I wanted the lights. They were then “blinked” on and off by waving a card in front of them, blocking them from hitting the model. In addition to saving some time & hassle, I think it gave a unique quality to the lights that LEDs wouldn’t have provided.
This worked because for all of the shots showing the ship moving through space, it’s the camera that’s moving instead of the ship. A wide 20mm lens was used for the opening shot to emphasize the movement as the ship gets closer, this was essential in achieving a sense of scale. I used a tabletop dolly (an “OmniTracker”) that required a flat surface; these surfaces and all the equipment used near the model had to be painted black or covered up with black cloth, so as not to reflect excess light onto the model. Rather than give an all-around detailed view of the ship, I wanted the light to be very harsh, with bright highlights and pitch-black shadows, mimicking the conditions in space where there’s usually not much around to diffuse or reflect light from the closest star.

This shows the ship mounted next to the platform the camera slid across. In this test shoot you can see what the model looked like with a white card used for fill, but ultimately I decided to go for the harsher look without it.
Pieces of black cardboard were attached in front of the lens to block off lights and parts of the studio visible in the shot due to the wide angle.
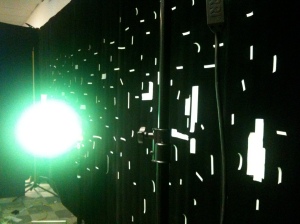
The stars were created by stretching out a piece of black cloth and poking holes in it with a thumbtack. Lights were then pointed at the camera through the cloth. Simple, but effective!
Adding the stars to the shots of the model was the only thing that required limited composting in post. Though I attempted to get both the ship and stars in-camera, it would’ve been too limiting for camera movement and lighting to do all the shots this way. Instead of shooting the model against greenscreen, I just masked out the stars that passed in front of the ship in Final Cut.

Test shot where the stars were shot along with the ship in-camera. This also shows an earlier test version of the model, made out of fewer parts.
Everything was done through trial & error, we just kept shooting stuff until it looked good. Using the 5D Mk II for miniature work had its advantages and draw-backs; I had to stop the lens down considerably to avoid shallow depth of field, but the camera’s light-sensitivity helped offset this problem. Everything was shot at ISO 1250, at around f22, with a single 1K light.
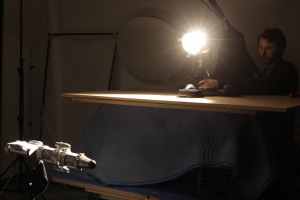
Here I tested out moving the light on the dolly instead of the camera, to simulate a fixed camera position as the ship turns. These shots were part of a test shoot and aren't featured in the trailer.
Spaceship interiors
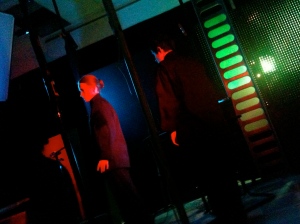
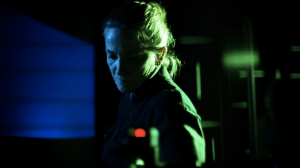
Though part of the film’s concept is an attention to physics and realistic outer space phenomenon, realism wasn’t the goal for the shots of the ship interior. Instead I wanted to go for an eye-catching retro aesthetic that would create the impression of technology beyond our current understanding but at the same time invoke a familiar science-fiction feel. I found inspiration in the neon colors of 1970’s and 80’s sci-fi. Films, anime, and video games back then often used bright colors and dark shadows to great effect. I wanted red and blue to be the dominant colors (an exaggerated visual reference to the observable “red shifting” and “blue shifting” of light that occurs when objects travel at very high speeds). Green was also used prominently to fill out the technological background of the ship.
My biggest limitation was a lack of funds or resources to build sets. Fortunately, the style I was going for allowed me to build the set almost entirely out of tricks of light and depth of field. Black flock was first hung up to cover all the walls of the studio, creating a completely dark frame as the base starting point for every shot. I found that attaching pieces of white tape to the background and then throwing the tape out of focus could result in some interesting patterns. Lighting the tape with gels allowed me to turn the patterns whatever color I wanted.
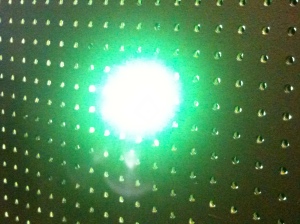
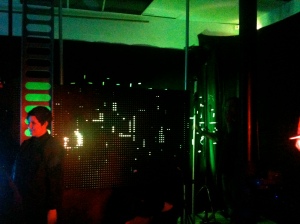
I then discovered that if you placed an object with a lot of holes in front of the tape, and shot through it, you could get a very interesting effect when the focus was set in front of the holes. Each hole effectively became a perfectly round “pixel,” and the tape would determine the shape formed by these pixels. Pegboard with evenly spaced holes was painted black and placed over the tape. The end result had a surprisingly digital look for something created in a completely analog fashion.

James Fauvell as Operator Hale. The pattern of lights behind him are created by the out-of-focus holes in the corkboard.
A few pieces of scrap metal were used to provide some base shapes, and projectors, flashlights, and laser pointers provided other effects. Foreground elements included plastic tubes, milk crates, and other stuff that was lying around.
On low-budget shoots, greenscreen work can often end up looking muddy & un-photographic. Even if you have great resources for post-production, you can find yourself on set lighting to get a good key instead of lighting for a mood or the content of a scene. If you can afford to take an open-minded approach, I think there are always alternatives to greenscreen and CGI. They are of course useful tools under the right circumstances, but I think many filmmakers over-rely on them, and have forgotten how effective the old techniques can be. Seeing an actual effect right through the lens gives you so much more control on set, and when you do need to combine multiple elements in a shot, there’s so much you can achieve with very simple compositing, as opposed to generating all your material on a computer.
—
Shooting the footage used for this trailer took a lot of time and effort, and there’s a lot more work I need to do to complete the final film. This is a completely indie production with no outside funding. If you want to help us make this film a reality, please support our project on Kickstarter! Check out our page for more info, and if you like what you see, pass the link along!




February 28, 2011 at 11:27 pm |
I love what you’re doing. I hope it comes to fruition. Maybe do a kickstarter.com project on it.
March 1, 2011 at 10:21 pm |
fantastic job!
March 7, 2011 at 9:09 am |
This is an epic win, can’t wait for you to finish, looks awesome.
March 7, 2011 at 9:42 am |
[…] La trama para c (via Vimeo) es la siguiente: Situada en un futuro distante, c cuenta la historia del Primer Teniente Malleck (Winterson) y su intento radical de salvamento durante una guerra fría interplanetaria. Tambén podeis ver algo de detrás de las cámaras en su blog. […]
March 7, 2011 at 5:35 pm |
[…] to salvage reason during an interplanetary cold war.Manchmal geht es auch ganz ohne Spezialeffekte.derekvg.wordpress.com via quietearth.usTags:C, Trailer, Video Tweet Short URL Kommentar schreibenKeine […]
March 8, 2011 at 1:36 am |
[…] c: behind the scenes « Derek Van Gorder – Film Blog. […]
March 8, 2011 at 4:40 am |
[…] Infos gefällig? Dann mal auf zum Blog des Regisseurs! Schlau: der Klammerwert entspricht der […]
March 11, 2011 at 12:52 pm |
[…] C: Behind the Scenes […]
October 12, 2013 at 6:15 am |
[…] the producer's blog entry showing how he did it. I would like to know more about how something like this can be done on the […]
October 12, 2013 at 5:36 pm |
Hi there. You can find more about the behind-the-scenes at:
http://www.wired.com/design/2013/01/kickstarted-scifi-movie/
http://ditogear.com/featured/spotlight-7-c-by-derek-van-gorder/
The corridor sets were pretty cheap. They were plywood frames, propped up on more plywood, covered with thin, dark brown hardboard, nailed in. That’s basically it. It was totally modular, so we just moved the frames around to build different sets. For the lights, we cut holes / patterns in the hardboard, covered the holes with paper and lit them from outside the set with fluorescent lights. Fluorescent lights were also built into the hallways. The only reason it looked cool was because of the colored gels on the lights, when the lights were turned off the material instantly looked like cardboard.